Chocolate Peppermints
This post may contain Amazon or other affiliate links. As an Amazon Associate I earn from qualifying purchases.
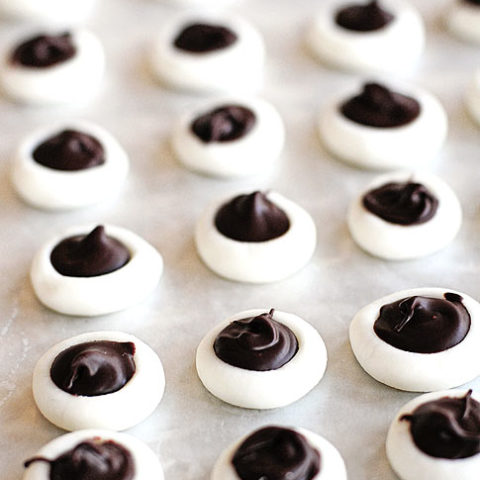
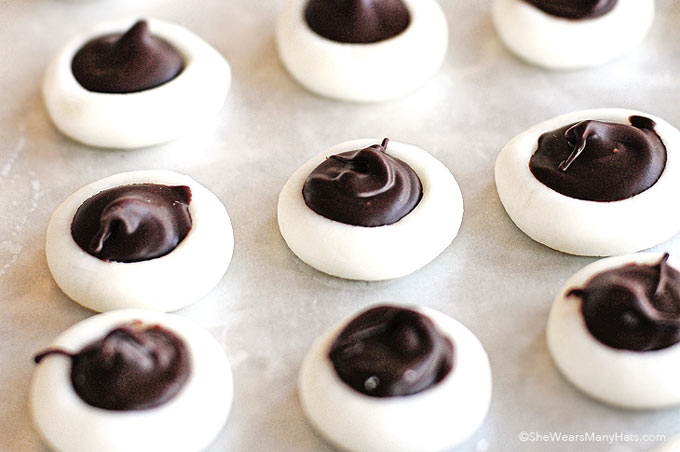
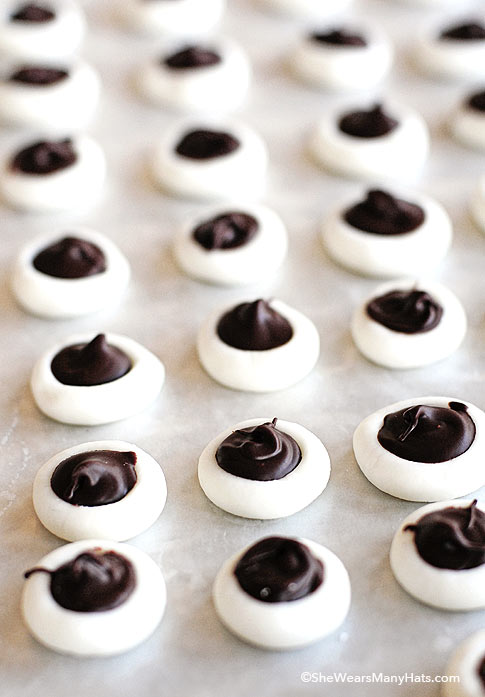
These homemade Chocolate Peppermints are easier than they look.
It’s funny how the mind works, or at least my mind. For example, years upon years (actually up until I googled it a few minutes ago) it didn’t occur to me that Peppermint Patties were named because of their shape, instead of after a person named Patty. I think Charlie Brown threw me off a bit. I was like, “I’m not sure who this Patty girl is, but her confections sure are the perfect follow-up to that Burrito Deluxe at our local Mexican restaurant.” Peppermint Patties are always at the checkouts at those restaurants for some reason. If we ever visit Mexico, and Peppermint Patties are not at the restaurant checkouts, we’ll certainly be miffed beyond degree.
So, there you go, Peppermint Patties are not named after Patty, or, I highly doubt, Hispanic inspired.
Anyway, I made my own version of Chocolate Peppermints, neither dipped, nor in a patty shape, but the same cool, refreshing taste reminiscent of Peppermint Patties. And you can call them whatever you’d like. Peppermint Amys has a nice ring, or Peppermint Freds. Perhaps Peppermint Jorgés? I think I like Peppermint Jorgés. Yes, I’m sticking with that. Peppermint Jorgés it is.
You’ll find many recipes around for chocolate dipped peppermints, but this is a very simplified version. As mentioned before, no dipping or exact patty shaping is involved, but instead, a mini bite of Chocolate Peppermint perfect for inclusion in the party spread (especially if it’s Mexican themed).
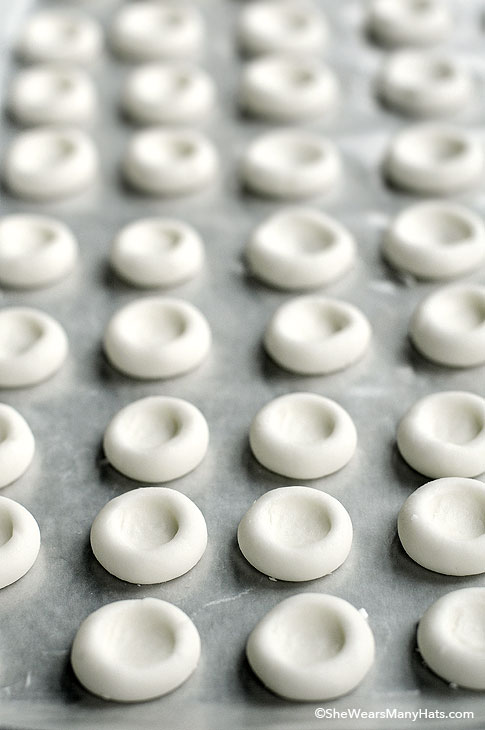
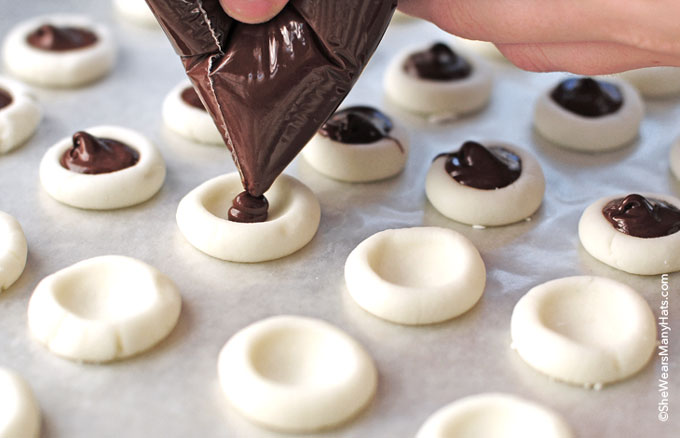
Begin with a simple combination of powdered sugar, cream cheese and peppermint extract. Create teaspoon size balls, and place on a wax paper or parchment lined baking sheets. Then gently press each peppermint ball to create a little “bowl” with a 1/4 teaspoon measure or your finger.
Chocolate Peppermint Recipe Tips:
- When making the cream cheese/powdered sugar mixture, gradually add the powdered sugar until the right texture is achieved. You may end up needing to add a bit more than listed in the recipe, or less. It should hold together, but not sticky.
- If working solo, only make a few balls at a time before pressing the bowls/indentations to avoid them drying and cracking. The best thing is to work with a fellow peppermint maker and have one person roll the balls, while the other follows behind making the bowls/indentations. A ball maker and a bowl maker make the perfect peppermint pair.
- Be sure to keep main peppermint mixture lightly covered with plastic or a damp paper towel while making the balls to avoid it drying out.
Once all the peppermints are pressed, cover with plastic wrap, and refrigerate for a few hours to let firm up a bit.
When peppermints are ready to fill, melt the chocolate chips according to package directions. I used the microwave method, which worked fine and dandy. Using a piping bag or plastic freezer bag with the corner snipped, fill each mini peppermint bowl with chocolate and let cool.
Since cream cheese is involved, remember to keep refrigerated until ready to serve. I think they should be okay left not refrigerated for a few hours during party/serving time. And stored, refrigerated in an air-tight container, they can be made days ahead.
There you have it. An easy version of Peppermint Patties, called Chocolate Peppermints, Peppermint Jorgés or whatever works for you.
You may also enjoy these other peppermint and chocolate recipes:
Chocolate Peppermints Recipe
Chocolate Peppermints
You'll find many recipes around for chocolate dipped peppermints, but this is a very simplified version. As mentioned before, no dipping or exact patty shaping is involved, but instead, a mini bite of Chocolate Peppermints, perfect for inclusion in the party spread.
Ingredients
- 1 pound confectioners sugar (powdered sugar)
- 4 ounces, weight cream cheese, softened
- 1/4 teaspoon peppermint extract
- 6 ounces semi-sweet chocolate chips
Instructions
- Using a mixer, gradually add the sugar to the cream cheese, beat well until incorporated.
- Add peppermint extract and combine well.
- Roll dough into teaspoon size balls and place on baking sheet(s) lined with wax paper or parchment. Create a small "bowl" or indention in each ball using a 1/4 teaspoon or your finger. Cover with plastic wrap and let firm up in refrigerator for a few hours.
- When peppermints have firmed, melt chocolate according to package directions (microwave is fine). Fill a piping bag or freezer bag with the corner snipped with the melted chocolate. Fill each mini peppermint bowl/indention with chocolate and let cool.
- Refrigerate in airtight container until ready to serve.
Notes
When making the cream cheese/powdered sugar mixture, gradually add the powdered sugar until the right texture is achieved. You may end up needing to add a bit more than listed in the recipe, or less. It should hold together, but not sticky.
If working solo, only make a few balls at a time before pressing the bowls/indentions to avoid them drying and cracking. The best thing is to work with a fellow peppermint maker and have one person roll the balls, while the other follows behind making the bowls/indentations. A ball maker and a bowl maker make the perfect peppermint pair.
Be sure to keep main peppermint mixture lightly covered with plastic or a damp paper towel while making the balls to avoid it drying out.
Updated post. This post was originally posted December 14, 2011.
(This post contains affiliate links.)





These certainly look 100x better than those after-dinner peppermints at restaurants!
Super Cute! They look so perfect 🙂 I will definitely be making these in the future and letting everyone know where I found the idea!
Thanks for sharing. 🙂
They look simple and beautiful. My kind of recipe. Yum!
Hi,
I am trying to make these and there seems to be not enough cream cheese. Is it supposed to be 1/4 cup or 1/4 lb?
thanks!
Hey Puppydogs!
Oh my!!! Thank you so much for commenting. The cream cheese amount is supposed to be 4 oz, weight NOT 1/4 cup. So sorry! I have fixed the recipe to show the correction.
A big thanks to you for pointing it out.
~ Amy
Ohhhh, *that’s* why the texture was so off, crumbly and refusing to hold together. I figured it was my fault, measuring wrong. 😉 Though I did simply keep adding more cream cheese until it seemed right! I also tried rolling the dough out between two sheets of waxed paper and cutting out little fluted rounds with my smallest cookie cutter. Then I layered those with the chocolate in between. They’re as pretty as they are delicious! (Love the suggestion above for a bit of food coloring, I’ll try that next time.) I’m taking them to the family Christmas Eve celebration tomorrow, so all’s well that ends well, huh? 🙂
Hey Kay!
So glad you persevered. I fixed my typo in the recipe above, so what’s up there now is correct. The peppermint “dough” is pretty stiff, and the balls are rolled together firmly. I found that the warmth of my hands helped to mold the balls, and again, keeping it from drying out by using slightly damp paper towels or plastic wrap to cover the peppermint mixture while forming the balls.
I bet your peppermint sandwiches are cute AND delish!
Merry Christmas!
~ Amy
I don’t think I’ve seen anything so pretty in my life Amy!
These are so neat!! I’m running out of baking time before Christmas, but I’ll definitely be making these – thanks!
I was making about the same recipe but putting the mint in a chocolate cup…this is so much prettier and not to mention easier to do! =) Will give it a try soon!!
I am absolutely cracking up at your introduction to this recipe. Peppermint Jorges HA!
You make me laugh! Love that and these beautiful Jorgés. 😉 Definitely on my list of “to try”!
Very clever! Love this idea.
Merry Christmas!!
oh my goodness, these are so cute, Amy!! Gorgeous! Happy New Year to you and your family!
wow I love these!
I’m a little late seeing these, don’t know why I didn’t before, but just got an SU request on them from someone. They look awesome and delicious! (I’m SO behind on SU!) Happy New Year! Hope your holidays were great!
Such pretty pix!
YUMMY, these are so pretty and I can only imagine how delicious. I’d like oh three dozen or so. I will figure out how to line my pockets then carry them around with me all day to enjoy!
these are absolutely gorgeous!!
These look just amazing! I can’t wait to make them.
LOVE!!! cant wait to make these!!
I’m very excited about these! I will be making these for my daughter’s 13th birthday party this weekend! Her colors are bright pink and black, so I’m going to color the mint pink to fit in with all the other pink foods. Thank You for sharing this recipe!
Wonder how they would work with the Peppermint Flavored Kisses?