White Bean Spread with Roasted Garlic
This post may contain Amazon or other affiliate links. As an Amazon Associate I earn from qualifying purchases.
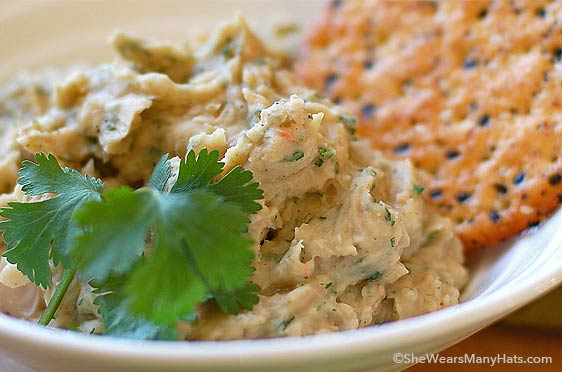
Dieting stinks. That’s why I don’t do it. However, I do need to lose weight that would amount to a small dog. Enter the White Bean Spread with Roasted Garlic.
Little changes over time are what I can stick to. The weight may come off slower, but slow is better than not at all. And healthy recipes, that are easy and quick to prepare without compromising taste are what will make the changes become life long habits. For me it’s gotta be simple, combined with fantastic flavor, or it’s highly unlikely that I’ll prepare it again.So in the hunt for healthy snacks that are satisfying, I’ve once again returned to the handy dandy bean with a White Bean Spread with roasted garlic. Beans are a favorite around our home. Black Bean Dip, Black Bean Hummus and White Bean Chili frequent our table often. I’m sure this White Bean Spread with Roasted Garlic will now be added to the repertoire.
As I said it’s easy. Super easy. Super duper easy. For real. And it’s not only easy but flavorful. Plus it’s packed with fiber and protein. Roasted garlic and fresh cilantro really pair well with the nuttiness of the beans. And you could always spice it up with some cayenne pepper and/or add more cilantro if you’d like.
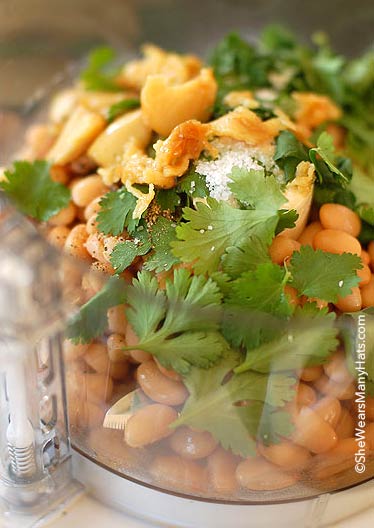
The ingredient list is small. All you’ll need is northern beans (or cannellini), a head of garlic, olive oil, cilantro, salt and pepper. So simple.
Start by preparing the garlic to roast. Remove a good amount of the papery skin on the garlic head. The individual cloves should still be wrapped. Next cut off the top of the head of garlic. Just a little – enough to reveal the individual cloves. After that drizzle the head of garlic with a little olive oil and wrap in aluminum foil to roast. I was out of foil. So I improvised by making a mini roaster by using 2 oven proof ramekins. It worked just fine. Basically the garlic needs to be covered so it doesn’t dry out. Bake the garlic in a 400° F oven for about 45 minutes. While the garlic is roasting warm the beans over low heat.
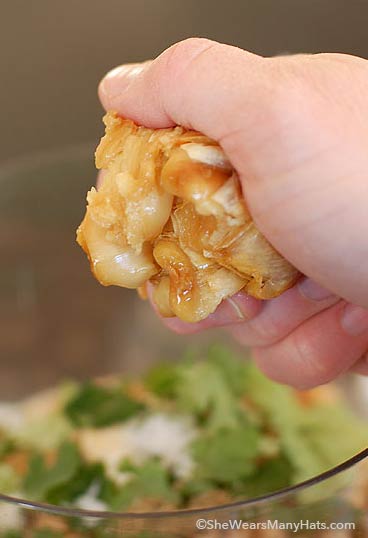
Roasted garlic smells wonderful! The garlic needs to cool to the touch. Once the garlic is good to go, pour the warmed beans in a food processor. Add the cilantro. Then Salt. The pepper goes in next. And here comes the fun part … squeeze the garlic out. Works like a charm.
Pulse a few times and run processor until smooth. You may need to add a little olive oil to loosen it up a bit. I added another 1/4 teaspoon (hardly any at all) but it could’ve taken more.
Now you’re ready to serve it along side crackers or my favorite, celery. It’s best served warm. If you want to make ahead and refrigerate it can easily be reheated. You may need to drizzle a little more olive oil while reheating to bring it back to life.
So good. And so good for you too. Hope you enjoy!

White Bean Spread with Roasted Garlic
A healthy dip and spread option.
Ingredients
- 1 head of garlic
- 1 1/4 teaspoon olive oil; divided
- 1 15.8 oz. can of northern beans (or cannellini)
- 1/4 cup fresh cilantro leaves; packed loosely
- 1/4 teaspoon salt
- 1/4 teaspoon pepper
Instructions
- Preheat oven to 400-degrees F.
- Peel most of the papery skin off of the head of garlic. Cut top off of garlic head to reveal individual cloves.
- Drizzle about 1 teaspoon of olive oil over garlic, lightly coating garlic all over.
- Wrap garlic in aluminum foil, or use a garlic roaster (or make your own), and bake in oven for 45 minutes.
- While garlic is roasting, warm beans in small pan on low.
- When garlic is finished roasting let cool to the touch.
- In a food processor combine the warm beans, cilantro, salt, pepper and roasted garlic cloves until smooth.
- If needed add a little olive oil at a time until you reach preferred consistency.


how to automatically improve the already-delicious white bean–add cilantro and roasted garlic. what a delightful spread, amy! one could eat much less tasty things in an effort to shed the weight of a small child, that’s for sure. 🙂
Great ingredients! I use all of these ingredients in my pasta fagiole, so I know it must taste good. I’m gonna have to give it a try.
Sounds delicious! I think I will try it without cilantro though. For some reason, I do not like cilantro and it does not like me. I wonder if another herb would mix well, in cilantro’s place…
Now this looks like one of those fast and tasty treats one could easily become addicted to! Garlic, cilantro and beans… just the mention brings me comfort 🙂
Mmmmmmm beans! I love beans 🙂
Wow… this looks great! I am totally craving that garlic! 🙂
Blessings-
Amanda
Looks delicious! I love white bean dip and am making one for a dinner party this weekend. A tip – to loosen your dip a bit, instead of using oil, you can just use water or the liquid from the beans.
I’m on a weight loss kick too….having to give away most of my blog posts for a while!
Now this dip is looking really good. I love garlic cooked that way, I could almost smell it in the photo of you squishing the cloves out. (And I also have a salt holder like yours- love it, don’t you?) Will be trying this next weekend.
That looks really good! Love the way you roasted the garlic. I have only just started to use actual garlic cloves in recipes instead of powder (sorry to shock you), and you make that look really easy.
Love this! Great snack or spread on a sandwich!
I’ll be trying that. I love beans and roasted garlic. I’m learning to like cilantro, I used to hate it. Might try it with Italian parsley too, and a touch of cayenne.
Looks super yummy! And I don’t think I’m allergic to one thing. It seems like you have lots of bean recipes. I need to dig through them more because basically I’m suppose to be on a vegetarian diet so beans should be top dog in my diet. I think I’d feel lots better if I could just find easy recipes like this. Now…to get the ingredients is another story….ha ha ha!
Hey Amy,
This looks absolutely yummy!!!! What kind of cracker did you serve with it?
I LOVE your salt thingy. The bean spread looks tasty and might be just the dip for superbowl. Trying to keep it some what healthy.
Hi Amy, I love this recipe and get requests for it when I’m invited to parties. I think my friends invite me because of this dip. Good luck with your weight loss. Keep moving. That helps! Thanks for bringing such yumminess to the screen.
this actually looks pretty good. i thinkthe garlic sold me. i looove me some stinky garlic breath.lol
i just made this for a get-together i’m having later on tonight, and just wow… absolutely incredible flavors and just the simplest dish to put together. would highlyhighly recommend this to anyone 🙂
How did I ever miss this!!!?!??! Going on my must-make very soon list!!!
love this, Amy! great recipe and gorgeous pics!
I’m so hungry right now looking at that! Totally making this for dinner tonight….may double it. 😉